Wednesday, April 6, 2016

OAK Tree Stamps-Bear Hugs Cards


I created several different cards using a WRMK-Happy Camper 6X6 paper pad. I didn't have any plan on what to do with them. I had several scraps so I used my Bear Hugs bear to add them on the blank spaces. I love the sentiments, the Hello one is a Stampin Up! die. To finish them off I added some clear orange enamel dots.

Here are a few close ups!!!


Thanks for stopping by and please check out oaktreestamps.com for more great stamps, sticker pages, and digital papers!!


Wednesday, March 16, 2016

Foxy- OAK Tree Stamps DT POST


I've been playing with all the OAK Tree Stamps-Sticker Pages, I just love them all. Omar does such a great job illustrating  and coloring the images. Keep It Foxy is my favorite set. There is so much you can do with these stickers. I Print Then Cut out this fox on cardstock, and just glued him on a pre-made card base. I added some layered flowers and twine to embellish it. I used the Keep It Foxy text sticker on the inside. This card would have took me all day if I would have had to color the image fussy cut it and everything else.
Check out oaktreestamps.com for all the super cute Sticker Pages - Coordinating Digital Papers - Stamps and more...

Thanks for stopping by- Chris 

Sunday, February 7, 2016

Football Cricut Guy

What team are you? I'm team Cricut!!!  I created Football Cricut Guy in Design Space using the Cricut from Store Front and A-Sport from Paper Doll Teen Scene. Here is the file/link so you can cut your own!!!!      


Enjoy and please share a pic if you create one!!!! 
-Chris 

Football Birthday Card-ScrappyDew DT Project


I created this football shaped card using the Football Boy 2015 pattern from ScrappyDew. My post day is on game day, that's why I made this shaped card. It was so fun to create this card, even though i'm not a football fan. I used the football as the card base by just enlarged it. I only had green paper with embossed dots, and no dot embossing folder so... I sprayed the green card stock brown with a Sharpie, EB7-Spectrum Noir, and my eBrush. All the other pieces are inked with various Tim Holtz Distress Inks. The face is stamped with ScrappyDew Facial Expression Stamps which I colored in with a colored pencil and white gel pen. I added pink chalk to his cheeks. I hand cut the flag and stamped Happy Birthday. I'm sure any little boy would love to get a card like this, with his favorite team's colors. 
Thanks for stopping by!!!! 
Visit scrappydew.com for more great patterns!!!
-Chris 

Friday, February 5, 2016

Homemade Watercolors


After watching a video that was posted to FaceBook about DIY Watercolors I really wanted to try it. Usually I don't try or it doesn't work out like it should. But i'm excited to say that I did and it worked out great...

Here is what you will need:

  • 1 Cup-Baking Soda
  • 3/4 Cup- Vinegar   
  • 2 TBSP- Corn Syrup 
  • 1 Cup- Corn Starch 
  • Food Coloring 
  • Ice Tray 
  • Mixing Bowl 
  • Mixing Spoon 
  • Toothpicks 


Then just watch this video and do what they do! http://skl.sh/diy-watercolor-tutorial


Keep Reading for a Quick Tutorial : 

Mix the measured ingredients in the same order as the video. 
1 Cup-Baking Soda
3/4 Cup- Vinegar   
2 TBSP- Corn Syrup 
1 Cup- Corn Starch 
Pour the mixture into your ice tray and start creating your colors with the food coloring.
Make sure you mix the food coloring in well with the toothpicks. You can use a new toothpick for each color or use the same one for like colors. 


Let it sit over night... Mine were a little wet in the afternoon of the next day. I just dabbed them dry with a paper towel. 

 These are my results of my Homemade Watercolors painted out :) 

This was so fun and mess everyone should definitely give it a try!!!! 
Thanks for stopping by!!! 
-Chris  

Special thanks to skillshare.com for the great video!!!! 

Wednesday, February 3, 2016

PS: I Love You Candy Wrappers -OAK Tree DT Post

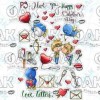
I'm so excited to share my first project using the NEW PS: I Love You Sticker Pages and Paper Packs from OAK Tree  Stamps. They are all completely digital so you can use both at different sizes and on different materials. I know most people will use these in journals and planners. I wanted to show that you can use them for more than just that. I got my chocolates from a Valentine's Day tin, I bought just for the artwork. I don't like chocolate, so I wanted to make them cute to give out to co-workers on Valentine's Day.

First Print Then Cut Your images... 
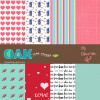
I used the Paper Pack Sheet as a Pattern Fill in Desing Space. 
I printed them on Cardstock so that they would be sturdier. 


 While my machine was cutting I  wrapped my chocolates with a scrap of light purple cardstock.   


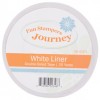
I used White Liner(double sided tape) to add the heart. I tucked one end of the twine behind the heart to keep it secure. I twisted the twine and secured the other end with the cute little kissing image, that was popped up on a foam square. 


It was missing something, duh add sparkle with sequins!!! 


They turned out really cute I hope you like them and I can't wait to see what everyone makes with these great new products from OAK Tree Stamps. 


Supplies I Used: 
Cricut Explore 
Random Sequins 
Scotch Foam Squares 


Tuesday, February 2, 2016

Ariel Themed Planner Spread


As most of you know I love the Little Mermaid. I wanted to create my Spread using the new OAK Tree Stamps Sticker Pages, but then i got an IDEA!!!  February is all about love and such... so... I am doing each week in my Planner for February with things that I love. The last week will be all of stuff my partner likes cuz it's his Birthday week. 

I really hope you like my Spread. I cut out "The Human World... It's A Mess" in Vinyl, I also made the paper clips, and one of the stickers. Everything else was store bought or from Etsy. 

Thanks For Stopping By! 
-Chris 


CGCDT Challenge # 269 - Fill in the Blank - .....

The theme for this challenge is:  ~ Fill in the blank -  _____ July ~ (4th, Christmas, vacation, gardening, picnic, etc.)     Our sponsors f...