I made these little cuties last night for my co-workers. I used a cut files from svgcuts.com. It's part of the Nightmare on Elm SVG kit. I just love how they turned out. I used old Stampin' Up Papers and some random embellies to accent the corner.
Hi, I'm Chris, Mr. Lopez, or The Cricut Guy...if you're crafty. I started with just scrapbooking and it turned into a whole world of papercrafting once I discovered YouTube and Cricut. My main goal is to inspire you through this blog. I will try and post all my crafts I create. Most will not have step by step instruction, unless it is a Design Team Post or I have the time to do it. Please enjoy my crafts, BE INSPIRED, feel free to ask me any questions!!!
Showing posts with label Cricut Explore. Show all posts
Wednesday, October 28, 2020
Sunday, May 8, 2016
Best Mummy Ever- ScrappyDew DT Post
I created this card using a sketch from a card challenge going on this week in my Cricut group The Pioneer Cricuteer. You can find the link to the card sketch DS file in my Graduation Card post, posted earlier this week. The super cute mummy can be found at scrappydew.com the pattern set is called Mummy Madness. I have so many cute files from ScrappyDew, I love thinking outside the box when using them. I was intimidated by this pattern but it was actually very easy. I used to different colored shimmer cardstocks on her. I inked all the edges with Hickory Smoke Distress Ink. To embellish the card I used dollar tree bling and a few random sequin. The sentiment is printed out on the same shimmer paper, I cut it out and added a border with the patterned paper.
Thanks For Stopping By & Happy Mummy's Day!!!
Chris
Sunday, May 1, 2016
Monkey Around - ScrappyDew DT Post
Just swinging by to share a birthday card I created for my ScrappyDew design team project. The patterns I used came from the Halloween Cuties and the balloon is from Birthday Boy Cake Smash.
I also used a grass cut from the Cricut library. I used various Distress Inks on all the edges and a white gel pen for highlight. The sentiment is from an old Virginia Turtle stamp set.
Thanks for stopping by...
-Chris
Sunday, April 24, 2016
Graduation Layout- ScrappyDew DT Post
Just dropping in to share my Design Team layout. I created it using a pattern from ScrappyDew's Graduation patterns. I can't wait to create cards for these grads in my family with these patterns. So stay tuned for more graduation inspiration!!!! Thanks for stopping by and please check out scrappydew.com and follow them on Facebook so you can see all the new sales and patterns!!!
Wednesday, February 3, 2016
PS: I Love You Candy Wrappers -OAK Tree DT Post
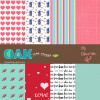
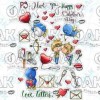
I'm so excited to share my first project using the NEW PS: I Love You Sticker Pages and Paper Packs from OAK Tree Stamps. They are all completely digital so you can use both at different sizes and on different materials. I know most people will use these in journals and planners. I wanted to show that you can use them for more than just that. I got my chocolates from a Valentine's Day tin, I bought just for the artwork. I don't like chocolate, so I wanted to make them cute to give out to co-workers on Valentine's Day.
First Print Then Cut Your images...
I used the Paper Pack Sheet as a Pattern Fill in Desing Space.
I printed them on Cardstock so that they would be sturdier.
While my machine was cutting I wrapped my chocolates with a scrap of light purple cardstock.
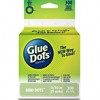
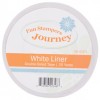
I used White Liner(double sided tape) to add the heart. I tucked one end of the twine behind the heart to keep it secure. I twisted the twine and secured the other end with the cute little kissing image, that was popped up on a foam square.
It was missing something, duh add sparkle with sequins!!!
They turned out really cute I hope you like them and I can't wait to see what everyone makes with these great new products from OAK Tree Stamps.
Supplies I Used:
Cricut Explore
Random Sequins
Scotch Foam Squares
Tuesday, January 5, 2016
Paper Clips- Oak Tree Design Team Project
Hey Oak Tree Fans!!! I am here to share another easy project using Oak Tree Stamps Digital Files with Print Then Cut on the Cricut Explore. I am addicted to making paper clips for my planner and I figured I'd show you how quick and easy it really is to make your own.
1. First Print Then Cut your images (2 inches). You can make them whatever size you'd like just make sure they won't take up your whole paper clip.
2. Ink the edges. I just like to ink everything!!! (this step is optional)
3. Cut out 1" circles or smaller depending on your images.
4. Hot glue your paper clip to the back and add the circle over the glue. Make sure your paper clip is facing the right direction, see the pic below. If you glue both the rounded parts down you won't be able to clip it to your pages.
DONE!!!!! Can't get much easier than that. The hardest thing is making sure you don't glue the paper clip upside down. They are so cute and you can use them for just about anything you can think of. I use mine for my planners, bookmarks, journals, and Pocket Letters.
Don't these just look so cute peeking out...
If you don't have the digital files, you can easily do this with the stamps and color them whatever colors you'd like.
What I used :
OAK Tree Stamps-Chibi Boy Expressions Coordinating Digital Files
OAK Tree Stamps Hello Spring Digital Files
Dollar Tree Jumbo Paper Clips
Fun Stampers Journey Cardstock-Whip Cream
Fun Stampers Journey Cardstock- Black Licorice
Cricut Explore- Print Then Cut
Tim Holtz Distress Ink- Black Soot
Fun Stampers Journey- Punch Handle
Fun Stampers Journey- 1" Circle Punch
Hot Glue Gun & Glue
Thanks For Stopping By!!!
-Christopher
Shop Here: oaktreestamps.com
Thursday, October 22, 2015
Critter Christmas Cards- Maymay Made It DT Post
I asked Maymay to surprise me with any of her awesome stamp sets to create with. I'm so glad she chose to send me Critter Christmas to play with. I had/have so many ideas to use with this set. I made two cards to share with everyone for now, as Christmas gets closer I'll share more here on my blog and in the Maymay Made It And So Did I! Facebook Group. Here are my Critter Christmas Cards, I made them A2 size which 4.25"X5.50".
![]() |
| Go Tail it on the Mountain-Mouse Card |
![]() |
| Owl Be Home For Christmas-Owl Card |
Mouse Card
1. I cut the first layer at 4"X 5.25". I then added a mountain I cut out of a scrap of coordinating paper, by just rounding the top.
2. The next layer is a cut from Cricut called North Pole, it's from the Winter Frolic-Cricut Cartridge. I cut it at 7.25" in width which was way larger but I sliced it to fit my first layer, it did cut of some of the image but i was happy as long as the trees fit. I glued the solid trees down with liquid glue, and popped the others up on dimensional tape.
3. The Mouse cut is 3.5" in height, you can find hi, on the Create A Critter 2 Cricut cartridge. I popped him up on dimensional tape also.
4. I stamped the sentiment from "Go Tail it on the Mountain" on a scrap cut it out then layered it on another scrap.
5. To tie in all the elements of the card I used only one color of Distress Ink to ink the edges of all my layers and die cut pieces. I used one of the newer Tim Holtz Distress Inks in Hickory Smoke.
6. I made a bow our of Tim Holtz Paper String, and slid it on a few pieces i had already wrapped around.
7. I wrapped some more string around the top. I then adhered the whole thing on the base with dimensional tape.
Owl Card
1. I cut two layers for this card, the first is 4"X 5.25" the second is 3.75"X5".
2. I then cut out three Owls, also from Create A Critter 2 Cricut cartridge. I cut them at 1.55" in width. I cut the first two layers with the same papers then switched up the papers for the other layers so I would have different colored owls, hats and scarves.
3. I added the owls one the second layer with dimensional tape. I then added the stamped sentiment like I did on the mouse card.
4. I wrapped some Tim Holtz Paper String around and under the owls to make it look as if they are sitting on it. I added a bow in the left to finish the card.
5. I adhered the first layer of the card on the base with liquid glue, then added the second one with dimensional tape.
6. I used only Vintage Photo Distress Ink to ink the edges of all the elements of this card.
I really hope you like my Maymay Made It Design Team project. I really enjoyed making them, and I hope I inspired those of you who have this set. If you don't have it you can get it using the link below.... If you have any other questions please don't hesitate to ask :) -Chris
1. I cut the first layer at 4"X 5.25". I then added a mountain I cut out of a scrap of coordinating paper, by just rounding the top.
2. The next layer is a cut from Cricut called North Pole, it's from the Winter Frolic-Cricut Cartridge. I cut it at 7.25" in width which was way larger but I sliced it to fit my first layer, it did cut of some of the image but i was happy as long as the trees fit. I glued the solid trees down with liquid glue, and popped the others up on dimensional tape.
3. The Mouse cut is 3.5" in height, you can find hi, on the Create A Critter 2 Cricut cartridge. I popped him up on dimensional tape also.
4. I stamped the sentiment from "Go Tail it on the Mountain" on a scrap cut it out then layered it on another scrap.
5. To tie in all the elements of the card I used only one color of Distress Ink to ink the edges of all my layers and die cut pieces. I used one of the newer Tim Holtz Distress Inks in Hickory Smoke.
6. I made a bow our of Tim Holtz Paper String, and slid it on a few pieces i had already wrapped around.
7. I wrapped some more string around the top. I then adhered the whole thing on the base with dimensional tape.
Owl Card
1. I cut two layers for this card, the first is 4"X 5.25" the second is 3.75"X5".
2. I then cut out three Owls, also from Create A Critter 2 Cricut cartridge. I cut them at 1.55" in width. I cut the first two layers with the same papers then switched up the papers for the other layers so I would have different colored owls, hats and scarves.
3. I added the owls one the second layer with dimensional tape. I then added the stamped sentiment like I did on the mouse card.
4. I wrapped some Tim Holtz Paper String around and under the owls to make it look as if they are sitting on it. I added a bow in the left to finish the card.
5. I adhered the first layer of the card on the base with liquid glue, then added the second one with dimensional tape.
6. I used only Vintage Photo Distress Ink to ink the edges of all the elements of this card.
![]() |
| Critter Christmas Set |
I really hope you like my Maymay Made It Design Team project. I really enjoyed making them, and I hope I inspired those of you who have this set. If you don't have it you can get it using the link below.... If you have any other questions please don't hesitate to ask :) -Chris
ALL ABOUT MAYMAY MADE IT & FALL/WINTER DT:
1. Maymay Made It stamps were created in 2013.
2. They are manufactured from high quality photopolymer right here in the USA.
3. 4x6 stamp sets (or what I call full size) are $11.99.
4. 4x4 stamp sets are $7.99.
5. Maymay Made It offers a stamp club. It is $11.99 per month USA and $13.49 per month international, there is not shipping charge and as long as you are a club member in good standing you can take advantage of free shipping on all stamps ordered from the Etsy store.
Maymay Links:
Get Maymay Made It Stamps here:
https://goo.gl/924Kwq
Maymay Made It Youtube:
http://goo.gl/EPxIBl
Stamp Club:
https://goo.gl/t8OuDo
Maymay Made It and So Did I Facebook Group
http://goo.gl/EPxIBl
Maymay Made It Fall/Winter Design Team:
Tracey Phillips
https://goo.gl/OQ6bp0
Tracey Phillips
https://goo.gl/OQ6bp0
Gareth Frewer
https://goo.gl/iuQewu
Christopher Lopez
http://goo.gl/ZemXd2
Stacy Williams
https://goo.gl/N7YUrg
Angela Urell
https://goo.gl/mwUCgd
Marla Rizzo
https://goo.gl/7GD92t
Tuesday, August 4, 2015
Baby Bumps Shoe~OAK Tree Stamps
![]() |
| Created For OAK Tree Stamps- Design Team |
I'm excited to share my first project for OAK Tree Stamps. I really wanted to make a card but figured why not try a Baby Shower party favor. The Baby Bumps Set had my head filled with thousands of ideas.
How I Created The Shoe:
1. I made the shoe with a file from SVGcuts.com's set Bundle Of Joy, cut with my Cricut Explore. It's only four pieces and goes together very easily. I added a button brad to the top strap, for a nice finished touch.
2. After stamping the baby from the Baby Bumps Set, onto Stampin' Up!-Whisper White Cardstock, I colored her in with 3 Spectrum Noir Markers( See photo or Supply list for colors).
If you lay on several layers you get different colors from one marker, Oak Tree Offers a great coordinating SVG file for all their stamps. I didn't use it I fussy cut my image because I need it a bit smaller.
![]() |
3. Using Foam Tape I adhered the baby and Welcome! flag on the top of the shoe.
4. To finish it all of, I used leftover paper and crimped it with a paper crimper and curled it with a thin marker. I made about 20, and stuffed them in the shoe with pink and white jelly beans.
Subscribe to:
Posts (Atom)
CGCDT Challenge # 269 - Fill in the Blank - .....
The theme for this challenge is: ~ Fill in the blank - _____ July ~ (4th, Christmas, vacation, gardening, picnic, etc.) Our sponsors f...
-
The theme for this challenge is: ~ Anything Goes w/optional twist - Make it Merry ~ Our challenge sponsor for this challenge is Beccy...
-
Remember last year's Awesome SVG's Halloween Boxes? Halloween is around the corner and I am so honored to be in this awesome b...
-
I'm so excited to be a new Journey Coach, I'm giving away a new Journey Grand die cutting machine!!! There is no purchase requir...