Showing posts with label Stamps. Show all posts

Thursday, July 7, 2016

Different But Best Friends Cards


Last night I stayed up late playing with my FSJ goodies. I have a few FSJ things but, I like to use what I already have to show that you can use the FSJ products with what you already have. I used all FSJ inks to stamp on scraps of various cardstocks I had(mostly recollections). The neutral toned card is all FSJ except the sequins and the background brown cardstock.  Most crafts think they have to use all the same product line and that is just not true. I am not very brand loyal but, I DO LOVE Fun Stampers Journey. I can't wait to create more cards with the Creature Comforts Bundle BD-0124


This set is on my FSJ website and includes:
DI-0191 Creature Comforts Die Set 
SS-0308 Creature Comforts Stamp Set 
For just $32.50 

Shop 24/7 @

Wednesday, July 6, 2016

Purrr-Day Party Goodies


I created these super cute party items for a co-worker who loves cats. I cut everything out with my Cricut. I used the Country Life cartridge to make the banner and the Happy Purr-Day is an SVG I created. The papers are from an old DCWV paper pad called The Pets Stack.  The cat is from a Fun Stampers Journey set called FEED ME. The set is earned for FREE when you place a $50 order.  I really hope she loves the surprise on her locker!!!  

What I Used;
Country Life Cartridge
DCWV-The Pet Stack 
FSJ-Hazelnut Blend Ink
FSJ-Journey Twine(Neutral)
Finding Dory- Goldfish
Various Enamel Embellishments
Recollections Tan & Pink Papers    
White and Pink Colored Pencils 

Thanks For Stopping By!!! 
-Chris 

Check out my FSJ website for more great stamps and other goodie!!! 
www.funstampersjourney.com/chrisslopez

Thursday, June 30, 2016

FUN STAMPERS JOURNEY NEWS

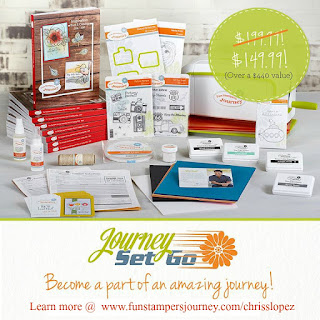
I'm excited to share all the exciting things going on this month! We have our Journey Set Go promotion going on!!! You can join the Journey for only $149. That is $50 off the regular price and you get over $400 worth of products. The Journey Platnum machine is $249 retail and its included.


Also, you can order all the new items!!!! I'd love to say I'd send everyone a catalog but they are pretty pricy to mail out. I'm sorry, but there are other Journey Coaches that are ready and willing to send them out. If you place a $100 order or higher on my site I'll gladly send you a catalog. 


Don't forget the Holiday Catalog!!!! Be sure to check that out all that stuff  when you stop over on my website.  The dies and stamps are AMAZING!!!! 

Here are a few cards I created using a couple new sets!!!


Check out my website to order all the new goodies or join my team!!!

New to FSJ... 
Email me your questions or concerns @
c.sean.lop@gail.com or find me on Facebook

Monday, June 13, 2016

FUN STAMPERS JOURNEY- 40% OFF SALE ENDING SOON!!!


I just wanted to post a reminder about the FSJ 40% 0ff Retirement Sale.  If you have any questions, please don't hesitate to ask! You can contact me via email c.sean.lop@gmail.com or on my FSJ website www.funstampersjourney.com/chrisslopez 

Thank You In Advance and Happy Shopping!!!! 
-Chris 

Tuesday, January 19, 2016

Thanks OAK Tree DT Post


Good Afternoon OAK Tree Fans, I just wanted to share a few quick and easy Thanks tags I created.  I made them just to have back ups for cards or any other special thank you gifts I may need.  

All I did was....
1. Cut or buy pre-made kraft colored tags. 
2. Stamp with  your favorite image with Black ink. Would be really cool in white too...
3. Cut out thanks or any one word, in a fun color. Let it hang off the tag it's more fun that way. 
4. Glue on the center letters to your tag. 
5. Add sequins, hearts, stars, any bling really. 
6. Finish off the tags by adding twine that matches your die-cut word.


What I used:  
OAK Tree Stamps -Bear Hugs Stamp Set 
Cricut Explore 
Tag- Ashlyn's Alphabet Cricut Cartridge 
Hello You Thinlets Dies- Stampin' Up! 
Momento-Tuxedo Black Ink
Enamel Hearts- From Tuesday Morning 
Twine From Dollar Tree 
Paper Studio-Kraft Cardstock 
Recollections Colored Cardstock  

Thanks For Stopping By -Chris 


Monday, December 7, 2015

Heart Background Card- Brutus|Monroe DT Post

Happy Monday!!!! I'm so excited to share first this month...  I know a lot of us have our Christmas cards done so why not start on Valentine's Day cards. I was inspired to make this card By Jennifer Mcguire of Jennifer McGuire Ink on YouTube. I'll share the link to the video/channel at the end of this post.

I used 3 different heart stamps, the large one is from the Many Thanks stamp set and the two smaller ones are from Serena Bee's Deadly Desserts stamp set. I used 3 different stamp blocks to make it easier, but if you just have one or two it's easy to swap the stamps.

Cut a piece of white cardstock to 4 X 5.25 inches, and start stamping. I used 5 Brutus|Monroe Premium Chalk Inks. I started with Wagon, there is no right or wrong way to do this just stamp randomly and have fun.
 Just keep going changing colors until you reached the bottom. If you mess up don't worry you can cover it with your sentiment, twine, or bling. Or, just trim it down like I did.  (tip:don't stamp the images in a straight line, let the different colored stamped images mix and blend)

I used a 3.25 X 4.5in die to cut out my background. I inked the edges with Black Soot Distress ink, and added it to a black card base.  

To finish off the card I added a sentiment from Love You Moon, and backed it with piece of black cardstock. I also added black rhinestones. Here is my finished card, I really hope you like it. 


Products I Used: 
Love you Moon 
Many Thanks 
Deadly Desserts 
Wagon 
Jack-o-lantern 
Phonebook
Jurassic
Oz 
Fun Stampers Journey Cardstock
Momento Tuxedo Black Ink 
Distress Ink-Black Soot 
Black Rhinestones

Here are the links to the YouTube channel and video:  

Thanks For Stopping By - Chris 

Tuesday, December 1, 2015

From MEOW To You Card- OAK Tree DT Post

Good evening I made a simple but super cute card for my Design Team project using the OAK Tree Stamps Cat-titude stamp set. Here is my card...

                                .

I cut a piece of yellow cardstock  to 4in.X 5 1/4in.. I stamped several images from the Cat-titude stamp set. I also used a tiny heart from Baby Bumps. I like to use a ink that is a similar color as my cardstock it gives it a great watercolor look.  There is no right or wrong way to do this just stamp the larger images first. Then fill in the small spots with little icon stamps.  I added the stamped paper to a A2  card base and added a little flag I hand cut and stamped my sentiment on. I added little enamel hearts just for a finishing touch.

I hope I inspired you to give this a try, it would be super fun with the Puppy Love or Baby Bumps OAK Tree Stamps sets. Please share pics if you give this a try!

What I Used:
OAK Tree Stamp Sets: Cat-itude & Baby Bumps
Momento Tuxedo Black Ink
Fun Stampers Journey True Color Fusion Ink- Pineapple Smoothie
Recollections Cardstock
Enamel Hearts-(i think i got them at Tuesday Morning)

Thanks For Stopping By -Chris

Thursday, November 19, 2015

Just BEEcasue- Maymay Made It! DT Project


I am very excited to share this Pinterest inspired card I created for my Maymay Made It design team project.  I made this fun Beehive shaped card. The Bee's Knees stamp set was so fun to play with.


Here is a quick how to:

1. Cut out all your pieces and ink them all up. Here is the Design Space file all sized and ready to go for you.  https://us.cricut.com/design/#/canvas/33407619  Optional : Stamp on a face with stamps or just use the bee as is. This bee would look super cute with facial features from Mamay's Happy Tree Set.  I used a Scrappy Dew stamp for this one.


2. Glue all the pieces where they go to make the card, just glue the hearts at the top closed. 
3. Using a gel pen I added a few more highlights to my bee and hive. 
4. I found the placement I wanted for for my bee and stamped the little trail from the set. I then stamped out "Just BEEcause". 
5. I popped up the bee on foam squares. Added a bow, and flowers just because I wanted more blue.
6. Inside of the card I wanted to use the honeycomb stamp. I had the square cut out and just simply stamped over it with a similar color of the paper. Use the same ink you use to ink the edges, unless its Distress Ink because it doesn't stamp well with photopolymer stamps.  Then I just stamped the sentiment "Hive been thinking of you!" in Momento Tuxedo Black. Then just glued it in. 


Here is the completed card, I hope you all like it. Most important I hope I have inspired you to pull out or buy this amazing stamp set!!!!  


What I used: 
Maymay Made It Stamp Set -The Bee's Knees 
Stampin' Write Marker- Pumpkin Pie 
Tim Holtz Distress Ink- Faded Jeans 
Fun Stampers Journey- True Color Fusion Ink- Pineapple Smoothie 
Prima  Flowers 
Blue Blings from my stach 
White Gelly Roll Pen 
Reccolections Papers 
Colorok- Midnight Black Textured Cardstock 
K&Co.-Itsy Bitsy 8.5X8.5 Paper Pad 
Black Nylon Ribbon 
Momento- Tuxedo Black Ink 
Cricut Explore 
Create A Critter Cricut Cartridge  


ALL ABOUT MAYMAY MADE IT & FALL/WINTER DT:

1. Maymay Made It stamps were created in 2013.
2. They are manufactured from high quality photopolymer right here in the USA.

3. 4x6 stamp sets (or what I call full size) are $11.99.
4. 4x4 stamp sets are $7.99.
5. Maymay Made It offers a stamp club. It is $11.99 per month USA and $13.49 per month international, there is not shipping charge and as long as you are a club member in good standing you can take advantage of free shipping on all stamps ordered from the Etsy store. 
Maymay Links:
Get Maymay Made It Stamps here:
https://goo.gl/924Kwq
Maymay Made It Youtube:
http://goo.gl/EPxIBl
Maymay Made It and So Did I Facebook Group
http://goo.gl/EPxIBl

Maymay Made It Fall/Winter Design Team:
Tracey Phillips
https://goo.gl/OQ6bp0
Gareth Frewer
https://goo.gl/iuQewu
Christopher Lopez
http://goo.gl/ZemXd2
Stacy Williams
https://goo.gl/N7YUrg

Thanks again for stopping by!!! -Chris

Saturday, October 24, 2015

OAK Tree Stamps Fall Release Party

I'm so excited to be part of the OAK Tree Stamps Fall Release Party!!!! 

Here is the cute candy wrappers I  made to share with friends using the NEW! Cat-titude Stamps Set.


In a few quick steps you too can make these. 

1. Stamp out the any of the cute kitty cats of your choice and the sentiment on patterned paper using a dark ink. Fussy cut the cat and make a banner with the sentiment. 
2. To make the actual wrap, just fold over a  piece of coordinating paper and adhere it on you candy. 
3. I wrapped twine around mine with a little bow just to add a fun touch. 
4. To finish it off add the cut Cat and banner on pop dots. I want a bit further and added a little enamel heart from my stash. 

Product list: 
Snack Sized-Kit Kats 
Paper Scraps 
Momento Tuxedo Black Ink 
Enamel Hearts
Just use what you have and have fun!!!! 

This is a great way to share a little treat with any friend just so they know you care. 

Thank you for stopping by my blog and checking out my project. Please leave a comment and follow and you will be entered to one of the original OAK Tree Stamp set. 

Incase you get lost or just stumbled upon this post, come over to the party!!! 
https://www.facebook.com/events/894714707233171/
Here Are The Sales:
NEW FALL BUNDLE ($33): http://bit.ly/1PNjVge
5 STAMP BUNDLE ($35): http://bit.ly/1NZJSJS
WICKEDLY CUT SET ($9): http://bit.ly/1GykTuo
50% OFF DIGITAL FILES: http://bit.ly/1ONXEPW
NO CODES NEEEDED!!!!
Here Are The Contests:
WIN THE 5 STAMPS BUNDLE:
Randomly selected from the "going" list (event Link above)
WIN A STAMP SET FROM A DESIGN TEAM MEMBER:
Each of my fellow design team members will be posting a project in today's event. Make sure to hop over to their blog to take a peek at their project. To enter all you have to do is follow their blog and comment on the project. Each designer will use random.org to pick their winner

Order your stamps here:

What set(s) will you be getting?! All 3 for me please!!!! 

Tuesday, October 6, 2015

Color Me- Stamped Treat Bags- OAK Tree DT Post


I'm just dropping in to share a fast & fun Design Team Project for OAK Tree Stamps.  How cute is the Wickedly Cute stamps set and I thought, Wow! Everyone would love to color those images.  I made these for my niece and nephew, I'm sure they will get enough candy. 

All you need is some crayons, treat bags and a "Wickedly Cute" stamp set. You can use any images but these are to cute not to use. I  simply stamped the images and sentiments on white card and cut it down to fit the bag. I add the orange to give a flatter coloring surface and also because it pulls in the color of the treat bag.  I used my ATG to adhere all the layers on the bag. Added an 8 pack of crayons and closed them up with a piece of washi tape.  

What I used:  
OAK Tree Stamps-Wickedly Cute Stamps Set (LIMITED QUANTITY AVAILABLE)
Vintage Treat Bags I got at a Local Thrift Store (Any Size will work, just be sure the crayons fit)
Crayola -8 Pk - Pick Your Pack  
Orange and White card Stock 
Momento Black Ink 
ATG

Thanks For 
Stopping By For A Spell
-Chris 


Tuesday, September 22, 2015

It's In The Mail- Pocket Letter


I'm so excited to share my first Design Team project for Maymay Made It Stamps. I want to thank all of you that have came over to my blog to see my project. I am the only Design Team member without a YouTube channel. See the end of the post to learn more about this great stamp line, and where you can find the other Design Team Members. My project is a Pocket Letter. Not sure what a Pocket Letter is? Here is a link to a great video by Janette Lane creator of Pocket Letters/Pocket Letter Pals.           

 Pocket Letter Pals-Janette Lane:https://youtu.be/OxHLkm0lZi0

Here is my Pocket Letter. 


I really enjoyed making this Pocket Letter, it was a challenge to make it using only one stamp set but I loved every minute of it. I think it turned out super cute. I would love to give it to one lucky person that leaves a comment on this post. I'll be adding goodies in the back!!! 
So leave a comment if you would like a chance to win this Pocket Letter!!!! 
CONTEST WILL END SEPT.30th, 2015 

1. I started out with a nine pocket trading card organizer. I cut 9 cards at 2.5 X 3.5, and inked the edges and inserted them to get the layout I wanted. 
2. I then stamped several envelopes on the different patterned papers, and fussy cut them. 
3. I cut out the postage stamp and mail box with my Cricut Explore. (cartridge and image info in product list) I inked all the edges with Distress Ink and pieced them. 
4. These 4 cards are my favorite because the Maymay Made it Stamps, helped me to make them so unique. 
     A. I cut this card out because i liked the banners. I then stamped the snail over the top of them directly on the card. I then stamped the snail on 2 different coordinating papers and cut out the shell and body and pieced them on the top of the first image I stamped. It's a great way to add color with out coloring. I then used a scrap cut at 2 inches 3/4in. to make a belly band. I stamped the "Snail Mail" sentiment and punched it out with a 1in. circle punch.  I added circle on the band and then tucked extra stamped envelopes behind it. 
     B. This card was super easy. I just stamped the "Do Not Bend" randomly on the card. I then cut out a flag from the paper line and stamped on it "Fragile". I inked the edges of the flag added it on with dimensional tape.
     C. This card was the same as the one above I stamped one sentiment randomly then just added another over it on layered coordinating papers.
     D. This card I simply layers 3 pieces of paper added the mail box die cut, stamped the Happy mail sentiment and and cut it into a flag an added it with a piece of foam tape. 


5. The bottom 3 pockets I simply added  the stamped and cut envelopes. The Postage Stamp card(s) i just put the to pieces side by side  glued down and then cut them in half. 
6. I added a banner by poking holes in my card organizer and running twine through it and tying  knots on the ends. I then used paper clips to add some more of those cute little cut out envelopes. 

Products I Used:

Maymay Made It-It's In The Mail Stamp Set 
DCWV- The Weekend Neutrals Stack 
Tim Holtz Distress Ink- Hickory Smoke 
Scotch- Advanced Tape Glider 
Tombow- Mono Multi Liquid Glue
EK Success- Cutter Bee Scissors
WRMK- Crop-O-Dile 
Twine from Target $1 spot
Acrylic Stamping Block 
Tim Holtz- Idea-ology- Mini Paper clips 
Cricut Explore 
Cricut Images: 
Postage-Sentimentals Cricut Cartridge  
Mail Box- Disney Mickey & Friends Cricut Cartridge
9 Trading Card Organizer 
Double-sided Foam Tape 


ALL ABOUT MAYMAY MADE IT & FALL/WINTER DT:

1. Maymay Made It stamps were created in 2013.
2. They are manufactured from high quality photopolymer right here in the USA.
3. 4x6 stamp sets (or what I call full size) are $11.99.
4. 4x4 stamp sets are $7.99.
5. Maymay Made It offers a stamp club. It is $11.99 per month USA and $13.49 per month international, there is not shipping charge and as long as you are a club member in good standing you can take advantage of free shipping on all stamps ordered from the Etsy store. 
Maymay Links:
Get Maymay Made It Stamps here:
https://goo.gl/924Kwq
Maymay Made It Youtube:
http://goo.gl/EPxIBl
Maymay Made It and So Did I Facebook Group
http://goo.gl/EPxIBl

Maymay Made It Fall/Winter Design Team:
Tracey Phillips
https://goo.gl/OQ6bp0
Gareth Frewer
https://goo.gl/iuQewu
Christopher Lopez
http://goo.gl/ZemXd2
Stacy Williams
https://goo.gl/N7YUrg

THANKS AGAIN FOR STOPPING BY MY BLOG!!!! 
Please feel free to ask any questions, leave a comment, and follow me.
-Chris 


Saturday, September 12, 2015

DEADLY SWEET-Brutus|Monroe Design Team Post


Good Afternoon !!! I'm here to share this fun card I made for the B|M Design Team. I love Serena Bee and her stamp set, her creepy-cute style is such an inspiration to me.  Here is how I made the card...

1. I stamped the cone, and then stamped over it with the topper. I colored in the images using the Brutus|Monroe Inks as a watercolor. I'll add a link below to Christopher Alan Designs YouTube Video on how to use the inks as watercolors. I fussy cut out the ice cream cone, inked the edges and  layered it  on a piece of coordinating card stock. I also fussy cut that, and inked the edges.  
2. I stamped the "you are deadly sweet!" sentiment. fussy cut it and added it on a coordinating banner flag. I  inked the edges with a sponge dauber and Brutus|Monroe Premium Chalk Ink in OZ. 
3. This is my favorite card layout because it's so easy. I always just use scraps and chop them to fit to my liking. After all my layers are adhered to my pre-made card base I add my image and sentiment using adhesive foam tape. 
4. To finish the card I added some enamel dots from my stash. 
Here is the link on the water color technique:
You can forward to 14:30 to see the watercoloring, or watch the whole thing because its a great card with other awesome Brutus|Monroe Products. 
What I used: 
Brutus|Monroe Limited Edition Serena Bee Stamps Set-Deadly Desserts
Brutus|Monroe Premium Chalk Ink-OZ
Brutus|Monroe Premium Chalk Ink-Wagon
Brutus|Monroe Premium Chalk Ink-Sidewalk
Momento Ink-Tuxedo Black
DCWV- The Chalk Fun Stack
Enamel Dots
ATG Gun
Cutter Bee Scissors 


Wednesday, September 9, 2015

Now & Forever Wedding Card- OAK Tree DT Post


I created this card just to have a fun twist on a traditional wedding card. My friend recently had a Neon Wedding so it inspired my card. Keep reading for a quick how to. 

1. I stamped the bride & Now & Forever Sentiment from the Oak Tree Stamp Set-Now and Forever on regular white cardstock. I fussy cut them out and I colored the bride with colored pencils. 

2. I layered the fussy cut images on a piece of coordinating cardstock and also cut fussy cut around them for a fun border and to make them pop.   

3. This is my favorite card layout because it's so easy. I always just use scraps and chop them to fit to my liking. After all my layers are adhered to my pre-made card base I add my image and sentiment using adhesive foam tape. 

4. To finish the card I added some layered sequins. I added pearls in the black ones and tiny rhinestones on the others to cover the tiny holes in the sequins. 

This was such a fun card to make I hope you all enjoy it and give this card layout a try. 

What I used:
OAK Tree Stamp Set-Now and Forever
Pre-made card base 
Sequins 
Pearls 
DCWV-The Chalk Fun Stack 
Momento Ink-Tuxedo Black 
White Cardstock
Paper Trimmer 

Tuesday, August 4, 2015

Baby Bumps Shoe~OAK Tree Stamps

Created For OAK Tree Stamps- Design Team


I'm excited to share my first project for OAK Tree Stamps. I really wanted to make a card but figured why not try a Baby Shower party favor. The Baby Bumps Set had my head filled with thousands of ideas. 

How I Created The Shoe:

1.  I made the shoe with a file from SVGcuts.com's set Bundle Of Joy, cut with my Cricut Explore. It's only four pieces and goes together very easily. I added a button brad to the top strap, for a nice finished touch. 

2.  After stamping the baby from the Baby Bumps Set, onto  Stampin' Up!-Whisper White Cardstock,  I colored her in with 3 Spectrum Noir Markers( See photo or Supply list for colors). 
If you lay on several layers you get different colors from one marker, Oak Tree Offers a great coordinating SVG file for all their stamps.  I didn't use it I fussy cut my image because I need it a bit smaller.  


3. Using Foam Tape I adhered the baby and Welcome! flag on the top of the shoe. 

4.  To finish it all of, I used leftover paper and crimped it with a paper crimper and curled it with a thin marker. I made about 20, and stuffed them in the shoe with pink and white jelly beans. 
Fun easy way to make coordinating  filler for boxes, bags, in this case shoe.

This is my first post and can't wait to do more. I  want to try and not just make cards, this line is so versatile the possibilities are endless.


What I Used:  

OAK Tree Stamps Set- Baby Bumps 
Momento Ink- Tuxedo Black 
Spectrum Noir Markers- FS3, CG1, PP1
Imaginisce- Baby Powder- Queen of the Crib Cardstock 
Paper Crimper 
TomBow Glue 
SVG Cuts.com- Baby Shoe file - Bundles Of Joy Set 
Coastal Bay Jelly Beans 
Dollar Tree- Foam Tape 


Thanks for looking !!!! -Chris 


Friday, May 29, 2015

Oh yeah!!!!! Almost for got....

I am on the Brutus Monroe Design Team, I really love all the stamps! I was so excited and honored when I was asked to join this amazing team.  There are only four spots and I got one. As DT we have to post to the Brutus Monroe Blog with every project so hopefully I can use that as a way to generate more traffic to my blog, and encourage me to blog more.

                        STAY TUNED FOR DT PROJECTS COMING IN JUNE!

                                                       BRUTUSMONROE.COM

ScrappyDew Design Team Projects, So far...


This card was made with Graphic 45 - Song Bird papers.
I used The SD-Scrap Factory with the Royals 2 Expansion pack.  The eyes are done with SD - Dew Drops Facial Expressions.    The stamped sentiment is from a Stampin" Up! stamp set.


 This wasn't really a Design Team project. I made him mainly to show the versatility of the Facial Expression-Dew Drop Stamp Sets. This is a Bear from Teddy Bear Parade Cricut Cartridge. I just hid the eyes and stamped them on.


This was a really easy simple project. I made the bag, then just added a head from a doll I cut out at the wrong size. then i used the Facial Expressions-Dew Drops Stamps to add her face. With a little highlight and bling for earrings it looks like it tooks awhile to make but was only about 15 minutes.


This was also just to show that you can use these Dew Drops  on Cricut cuts as well as ScrappyDew patterns. This little guy is from Create A Friend. I really love the versatility of these stamps.


Check out ScrappyDew I'm sure you will find several thing you just can't live with out!   SCRAPPYDEW.COM

If you have any questions, please feel free to ask :)
Thanks For Stopping By
-Chris

Monday, March 30, 2015

Shadow Layer Card Base

I watched a great video on YouTube by Crafts By Two, that inspired the card below. Ken and George are so funny!!! I really just wanted to make this blog post so that I could share the inside stamped sentiment. It does have a naughty word that I didn't want anyone to get offend by on Facebook. If you're here to see from Facebook... Welcome To My Blog!!!!


****WARNING****
(naughty word below)


Little bit more about the this cute card...
The eyes and mouth are stamped with the Virgina Turtle Set-Cutiepants Assortment . I love these face stamps because you can arrange them however you want. The sentiment is also from a great Virgina Turtle set called Sassy B*tch. I love being part of the VT-Design Team.  This card was  really easy to make with my Cricut Explore, and Design Space. Be sure to check out Crafts By Two's Video(link below) give it a thumbs up, and don't forget to subscribe to their channel. The poodle is an image from the Create A Critter-Cricut Cartridge.  If you have any questions about the card,supplies, anything please don't hesitate to ask.

Thanks For Stopping By
~Chris

Special Thanks To Crafts By Two for the inspiration, and allowing me to share their video!!!

Here is the Crafts By Two link:


Also Check out Virgina Turtle Stamps!!!
 

CGCDT Challenge # 269 - Fill in the Blank - .....

The theme for this challenge is:  ~ Fill in the blank -  _____ July ~ (4th, Christmas, vacation, gardening, picnic, etc.)     Our sponsors f...