Showing posts with label Pocket Letter. Show all posts

Thursday, January 7, 2016

Valentine's Day Tags for Pocket Letters


Good Morning Crafty Friends!!! I wanted to drop in to share these cute tags I created. I got them from Michael's for 50 Cents, not knowing what I'd do with them. I  signed up for a couple Valentine's Day Pocket Letter swaps so I figured I'd use them for that!!! The heart shaped one will probably end up in  an art journal.  


 \
I stamped the Girl in Black Licorice- True Color Fusion Ink.  I then randomly stamped the flowers from the same FSJ stamp set Media Artist. I colored her with markers, colored pencils, chalks, and a Gelly Roll pen.   


These will be going in Pocket Letters. I stamped the flowers in Sweet Berry- True Color Fusion Ink. then stamped the sentiment from FSJ's Stamp Set Bot Love.  I added Journey Twine to finish off the tags. I think they will look really cute in pocket letters!!! 

You can fin all the Stamps and Inks on over on my website; 

Thanks for stopping by!!!! 
 -Chris 

Tuesday, September 22, 2015

It's In The Mail- Pocket Letter


I'm so excited to share my first Design Team project for Maymay Made It Stamps. I want to thank all of you that have came over to my blog to see my project. I am the only Design Team member without a YouTube channel. See the end of the post to learn more about this great stamp line, and where you can find the other Design Team Members. My project is a Pocket Letter. Not sure what a Pocket Letter is? Here is a link to a great video by Janette Lane creator of Pocket Letters/Pocket Letter Pals.           

 Pocket Letter Pals-Janette Lane:https://youtu.be/OxHLkm0lZi0

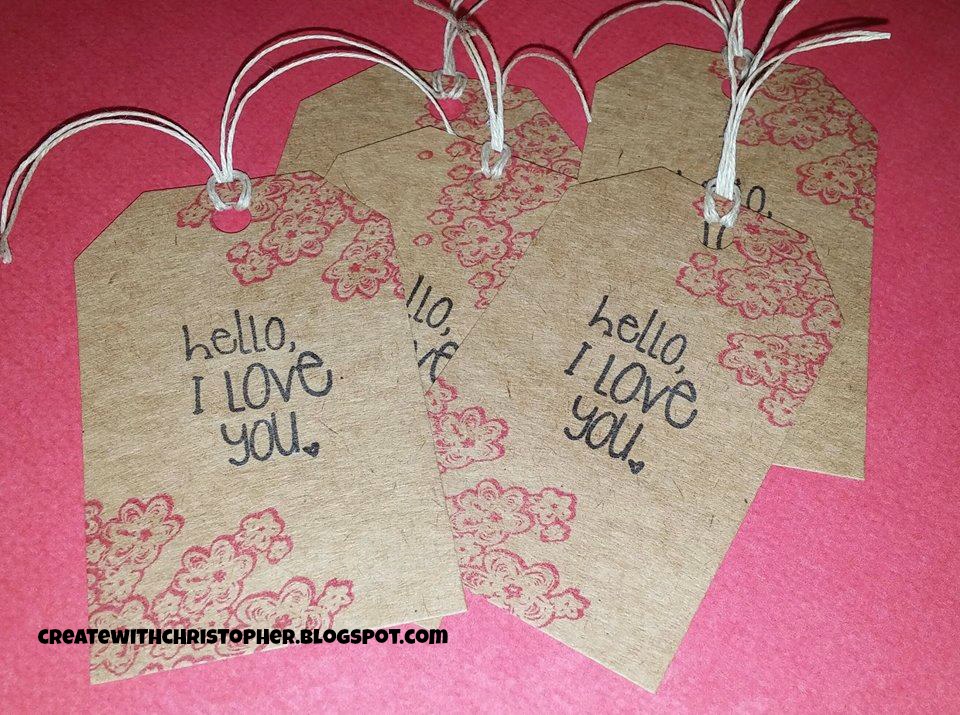
Here is my Pocket Letter. 


I really enjoyed making this Pocket Letter, it was a challenge to make it using only one stamp set but I loved every minute of it. I think it turned out super cute. I would love to give it to one lucky person that leaves a comment on this post. I'll be adding goodies in the back!!! 
So leave a comment if you would like a chance to win this Pocket Letter!!!! 
CONTEST WILL END SEPT.30th, 2015 

1. I started out with a nine pocket trading card organizer. I cut 9 cards at 2.5 X 3.5, and inked the edges and inserted them to get the layout I wanted. 
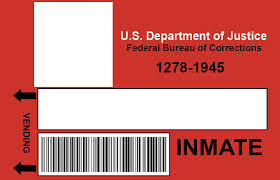
2. I then stamped several envelopes on the different patterned papers, and fussy cut them. 
3. I cut out the postage stamp and mail box with my Cricut Explore. (cartridge and image info in product list) I inked all the edges with Distress Ink and pieced them. 
4. These 4 cards are my favorite because the Maymay Made it Stamps, helped me to make them so unique. 
     A. I cut this card out because i liked the banners. I then stamped the snail over the top of them directly on the card. I then stamped the snail on 2 different coordinating papers and cut out the shell and body and pieced them on the top of the first image I stamped. It's a great way to add color with out coloring. I then used a scrap cut at 2 inches 3/4in. to make a belly band. I stamped the "Snail Mail" sentiment and punched it out with a 1in. circle punch.  I added circle on the band and then tucked extra stamped envelopes behind it. 
     B. This card was super easy. I just stamped the "Do Not Bend" randomly on the card. I then cut out a flag from the paper line and stamped on it "Fragile". I inked the edges of the flag added it on with dimensional tape.
     C. This card was the same as the one above I stamped one sentiment randomly then just added another over it on layered coordinating papers.
     D. This card I simply layers 3 pieces of paper added the mail box die cut, stamped the Happy mail sentiment and and cut it into a flag an added it with a piece of foam tape. 


5. The bottom 3 pockets I simply added  the stamped and cut envelopes. The Postage Stamp card(s) i just put the to pieces side by side  glued down and then cut them in half. 
6. I added a banner by poking holes in my card organizer and running twine through it and tying  knots on the ends. I then used paper clips to add some more of those cute little cut out envelopes. 

Products I Used:

Maymay Made It-It's In The Mail Stamp Set 
DCWV- The Weekend Neutrals Stack 
Tim Holtz Distress Ink- Hickory Smoke 
Scotch- Advanced Tape Glider 
Tombow- Mono Multi Liquid Glue
EK Success- Cutter Bee Scissors
WRMK- Crop-O-Dile 
Twine from Target $1 spot
Acrylic Stamping Block 
Tim Holtz- Idea-ology- Mini Paper clips 
Cricut Explore 
Cricut Images: 
Postage-Sentimentals Cricut Cartridge  
Mail Box- Disney Mickey & Friends Cricut Cartridge
9 Trading Card Organizer 
Double-sided Foam Tape 


ALL ABOUT MAYMAY MADE IT & FALL/WINTER DT:

1. Maymay Made It stamps were created in 2013.
2. They are manufactured from high quality photopolymer right here in the USA.
3. 4x6 stamp sets (or what I call full size) are $11.99.
4. 4x4 stamp sets are $7.99.
5. Maymay Made It offers a stamp club. It is $11.99 per month USA and $13.49 per month international, there is not shipping charge and as long as you are a club member in good standing you can take advantage of free shipping on all stamps ordered from the Etsy store. 
Maymay Links:
Get Maymay Made It Stamps here:
https://goo.gl/924Kwq
Maymay Made It Youtube:
http://goo.gl/EPxIBl
Maymay Made It and So Did I Facebook Group
http://goo.gl/EPxIBl

Maymay Made It Fall/Winter Design Team:
Tracey Phillips
https://goo.gl/OQ6bp0
Gareth Frewer
https://goo.gl/iuQewu
Christopher Lopez
http://goo.gl/ZemXd2
Stacy Williams
https://goo.gl/N7YUrg

THANKS AGAIN FOR STOPPING BY MY BLOG!!!! 
Please feel free to ask any questions, leave a comment, and follow me.
-Chris 


Saturday, August 15, 2015

3D Pumpkin Kit For Halloween Pocket Letters


 I'm excited to share with you all what I include in my Build 3D Pumpkin Kit for my Halloween Pocket Letter, and how to put the pumpkins together. This is a great way to make your Halloween Pocket Letters more interactive. The photo above is the card I made for front of the kit pocket.


This is what you will find in my Build A 3D Pumpkin Kits*:
(And what you can include in yours)
12- Pre-cut, Strips are 1/2in. X 3in, punched with a small hole on each end.
2- Pre-cut, 1in. leaves punched with a small hole. (cut leaves with die-cut machine or punch)
4- Brads(2 will be holding the pre-cut stips together)
10-12in. of twine or ribbon
I've also included a QR to scan and direct my PL Pal to find my blog and also my blog address so they can find this post on how to make their pumpkins.

*Believe it or not this all fits in one 3 1/2in. X 2 1/2in. pockets.


NOW LETS BUILD 3D A PUMPKIN 

1. Make sure your brad is on the wrong side of the strips. The side you want to show on the out side should have the back of the brad. If you put it the other way it may not sit flat. I've already done this on my kits because it's a bit confusing to explain. 

2. Spread out all the strips. Lay it out so that all you can see is the back side of the strips and the top of that first brad. 

3. Add a brad to the leaf, then pull up opposite strips and add them to the brad like in the photo below. Complete this until you have all 6 strips on the brad and then close the brad.   

4. Press gently on the top to get a great pumpkin shape. 

5. You should have something similar to this, add ribbon or twine on the top for a nice finished touch.

These are so fun and super easy to make. You can make them bigger and stuff them with candy for trick or treaters. This is great kid friendly craft too. I hope you enjoyed this idea for your Halloween  Pocket Letters. If you are visiting my blog because you received a pocket letter from me with this kit, I hope you enjoyed your Pocket Letter and making your pumpkins. 

THANKS FOR STOPPING BY!!! 
-Chris

Wednesday, August 5, 2015

OITNB Pocket Letter & ID Badge

I recently did an Orange Is the New Black themed Pocket Letter swap with my Facebook BFF Jennifer Laging. I had so much fun creating all the cards and adding the extra goodies. I used my Cricut Explore to create the ID badge and I knew everyone would want to know how it was done. It was very easy to do.  Keep reading to see how....


Upload the above image into Cricut Design Space, with a square photo of your favorite inmate. Make sure you do a Basic Upload, and click complex image. Insert both images into a new project. Resize the square photo of your inmate to fit in the square on the badge. Then using a simple font add your inmates name. If you want it like the show, do it like I did Jen's.  Once you have everything sized and in it's spot select everything and click Attach. I always check to make sure everything is going to Print Then Cut and not just Cut, to check this there will be a printer icon next to your images and text.  Once you've got everything ready to go you can size it to fit in a Pocket Letter, or how fun would these be for a OITNB Viewing Party. If you need more instruction or help please feel free to let me know via FB or in the comments. 


   Jennifer told me she loved all the inmates but her favs are Red and Crazy Eyes, which is why I used them on the front. I know you can't see it but on the back Crazy Eyes Pocket I put a I'd Throw my Pie For You sign, and filled the pocket with die cute dandelions and chocolate and vanilla swirl die cuts.  In the Red pocket I added her Chicken Quote and a bunch of die cute orange chickens. Yes! I did buy Top Ramen, just to steal the flavor packets lol... They fit and tied in so well with the theme. The other goodies don't really tie in with the theme I just used them to stay with the color scheme and send Jen some other crafty goodies.

Thanks for stopping by my blog please click Follow and Leave a Comment...  -Chris


FUN LINKS!!!!

What is a Pocket Letter? How it got started:
 https://www.youtube.com/watch?v=OxHLkm0lZi0

OITNB- Opening Credits-You've Got Time
https://youtu.be/fBITGyJynfA

OITNB- Red's Chicken Quote
https://youtu.be/LNwDcr2qP4M


CGCDT Challenge # 269 - Fill in the Blank - .....

The theme for this challenge is:  ~ Fill in the blank -  _____ July ~ (4th, Christmas, vacation, gardening, picnic, etc.)     Our sponsors f...